Tuesday, January 10, 2012

More Adventures in Mold Making: Shoulder Pads

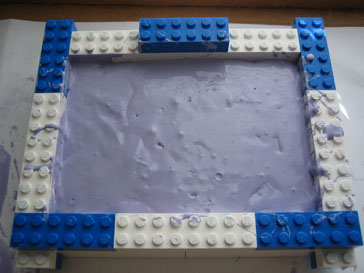
Here's my attempt at casting shoulder pads.


I got careless and forgot to spray the release agent before pouring the second half of the mold. 


I had to cut it at the edges and tear it apart by hand; with any luck I should still be able to get usable casts.


Monday, January 9, 2012

Further Adventures in Casting

Thursday, December 8, 2011

Another attempt at casting:

This time I managed to get the resin to travel through the mold and out the top.

Lots of air bubbles in this one. But at least I have a miniature figure of sorts :)


The figure with the arms is missing her left hand and all the faces and helms suffer from air bubbles.

So I cut more vents into the mold to let the air escape, with the following result:


It is better than the first cast but there are still too many air bubbles.
 

I used green stuff on one of the figure to fill in all the holes left by the air bubbles. The air bubbles on the heads are particularly problematic since it disfigures the face. I had to re-sculpt the nose and mouth.


I made several further attempts at casting with similar results. I tried vibration, rotating and talc powder to no avail :(

I think I got too ambitious with getting all the parts in a single mold, resulting in a mold that doesn't allow proper flow of  resin (and air) through it.

I ran out of the mold making material since I wasted a lot of it during these lessons. When my order arrives I'll I'll try making a simpler mold that is more optimized for air flow.

Wish me luck!

First Cast = Epic Fail :(

Saturday, Dec 3, 2011

The finished two part mold:


The first cast!


Epic fail! :)
There wasn't enough pressure for the resin to push out the air and flow through the mold.

It all back-flowed out of the top instead, leaving me with a mess of plastic resin :(

At least the resin is easy to clean up once it hardens; you just need to pry it off.

Next time I'm going to enlarge the sprue area to allow for better flow and use a syringe to inject the resin.

My First Try at Mold Making

Wednesday, Nov 30, 2011

I finally got around to trying my hands at mold making and casting.

I used the Pourable Silicone Starter Kit from Smooth On for this:


Here are the figures placed into the clay up to the parting line for each of the parts:


Close up of the parts:
 

Added vents for the resin to flow through and release air:


Front side of the mold done:


Backside of the mold poured:


I apparently took too much time before pouring since the mixture started hardening as I did so. It resulted in a lumpy surface on the outside. With any luck the actual mold surface inside is fine.

I must not have mixed the two parts equally since the front and back side of  the molds are rather different in color. One is a lighter blue and other more purplish. I wonder which one is the correct color for a proper mixture?

Saturday, December 24, 2011

Happy Holidays!

Happy Holidays from our family to yours.

 
May your Holidays be filled with warmth, joy and love!

Monday, October 31, 2011

Exorcists Chapter Icons


This is a joint project with Mike Youtz, a talented mold maker and resin caster; I sculpt the icons and he makes the mold and cast them for our armies.


Icons for Land Raiders:


 Icons for Rhinos:


Shoulder pads: Regular and Terminator sized:


W.I.P. Alternate Battlesuit